Quickstart
This quickstart will guide you through Turnkey’s onboarding, adding an API key, creating a wallet, and signing your first Ethereum transaction.
Create your Turnkey Organization
- Visit app.turnkey.com/dashboard/auth/initial and enter your email address
- Confirm your email by clicking on the link inside of the confirmation email
- Follow the prompts to add your first authenticator and create your organization
Find your Organization ID
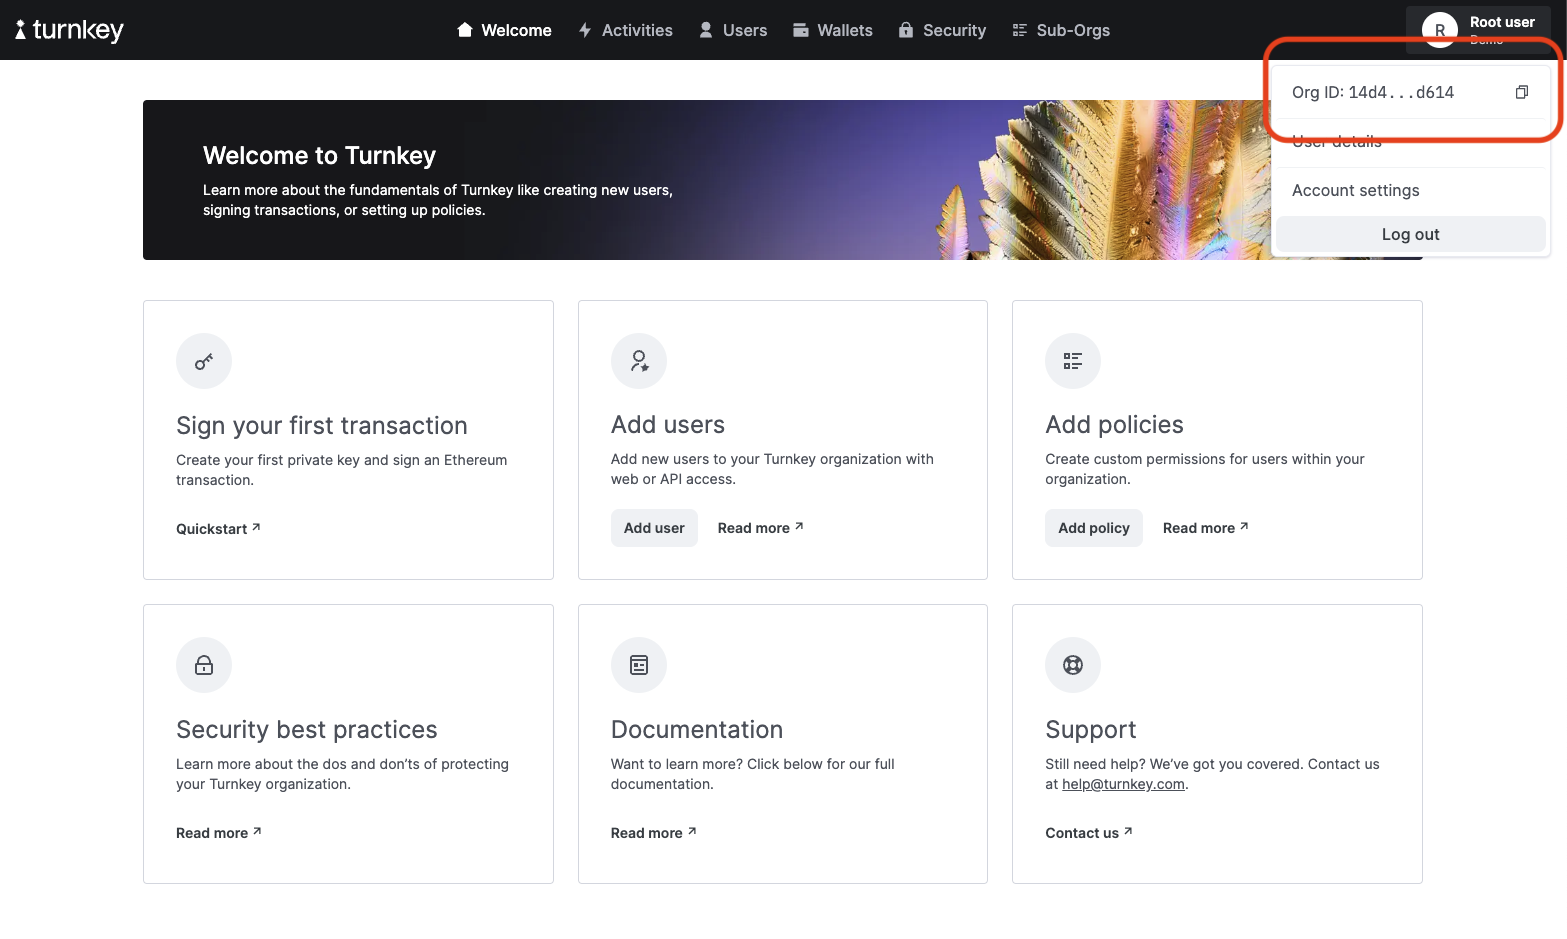
All API requests require an organization ID. Yours can be located in the user dropdown menu at the top right corner of the dashboard.

You'll want to save this somewhere in your code, as you'll need it to make requests to the Turnkey API.
const TURNKEY_ORGANIZATION_ID = "<Your Org ID>";
Create an API Key
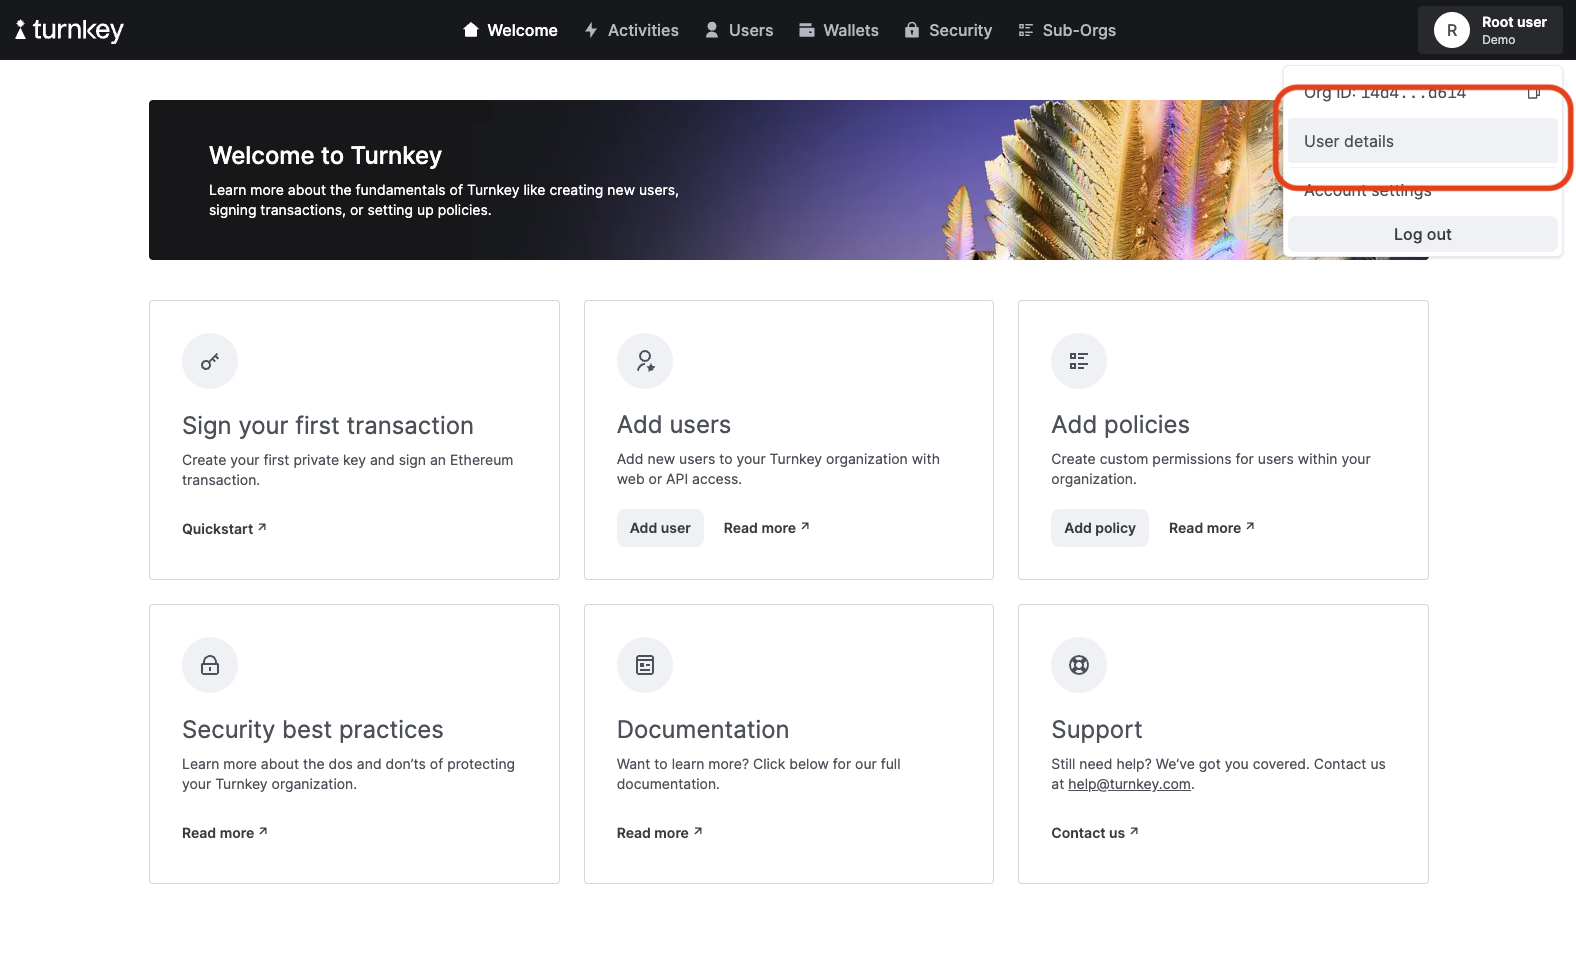
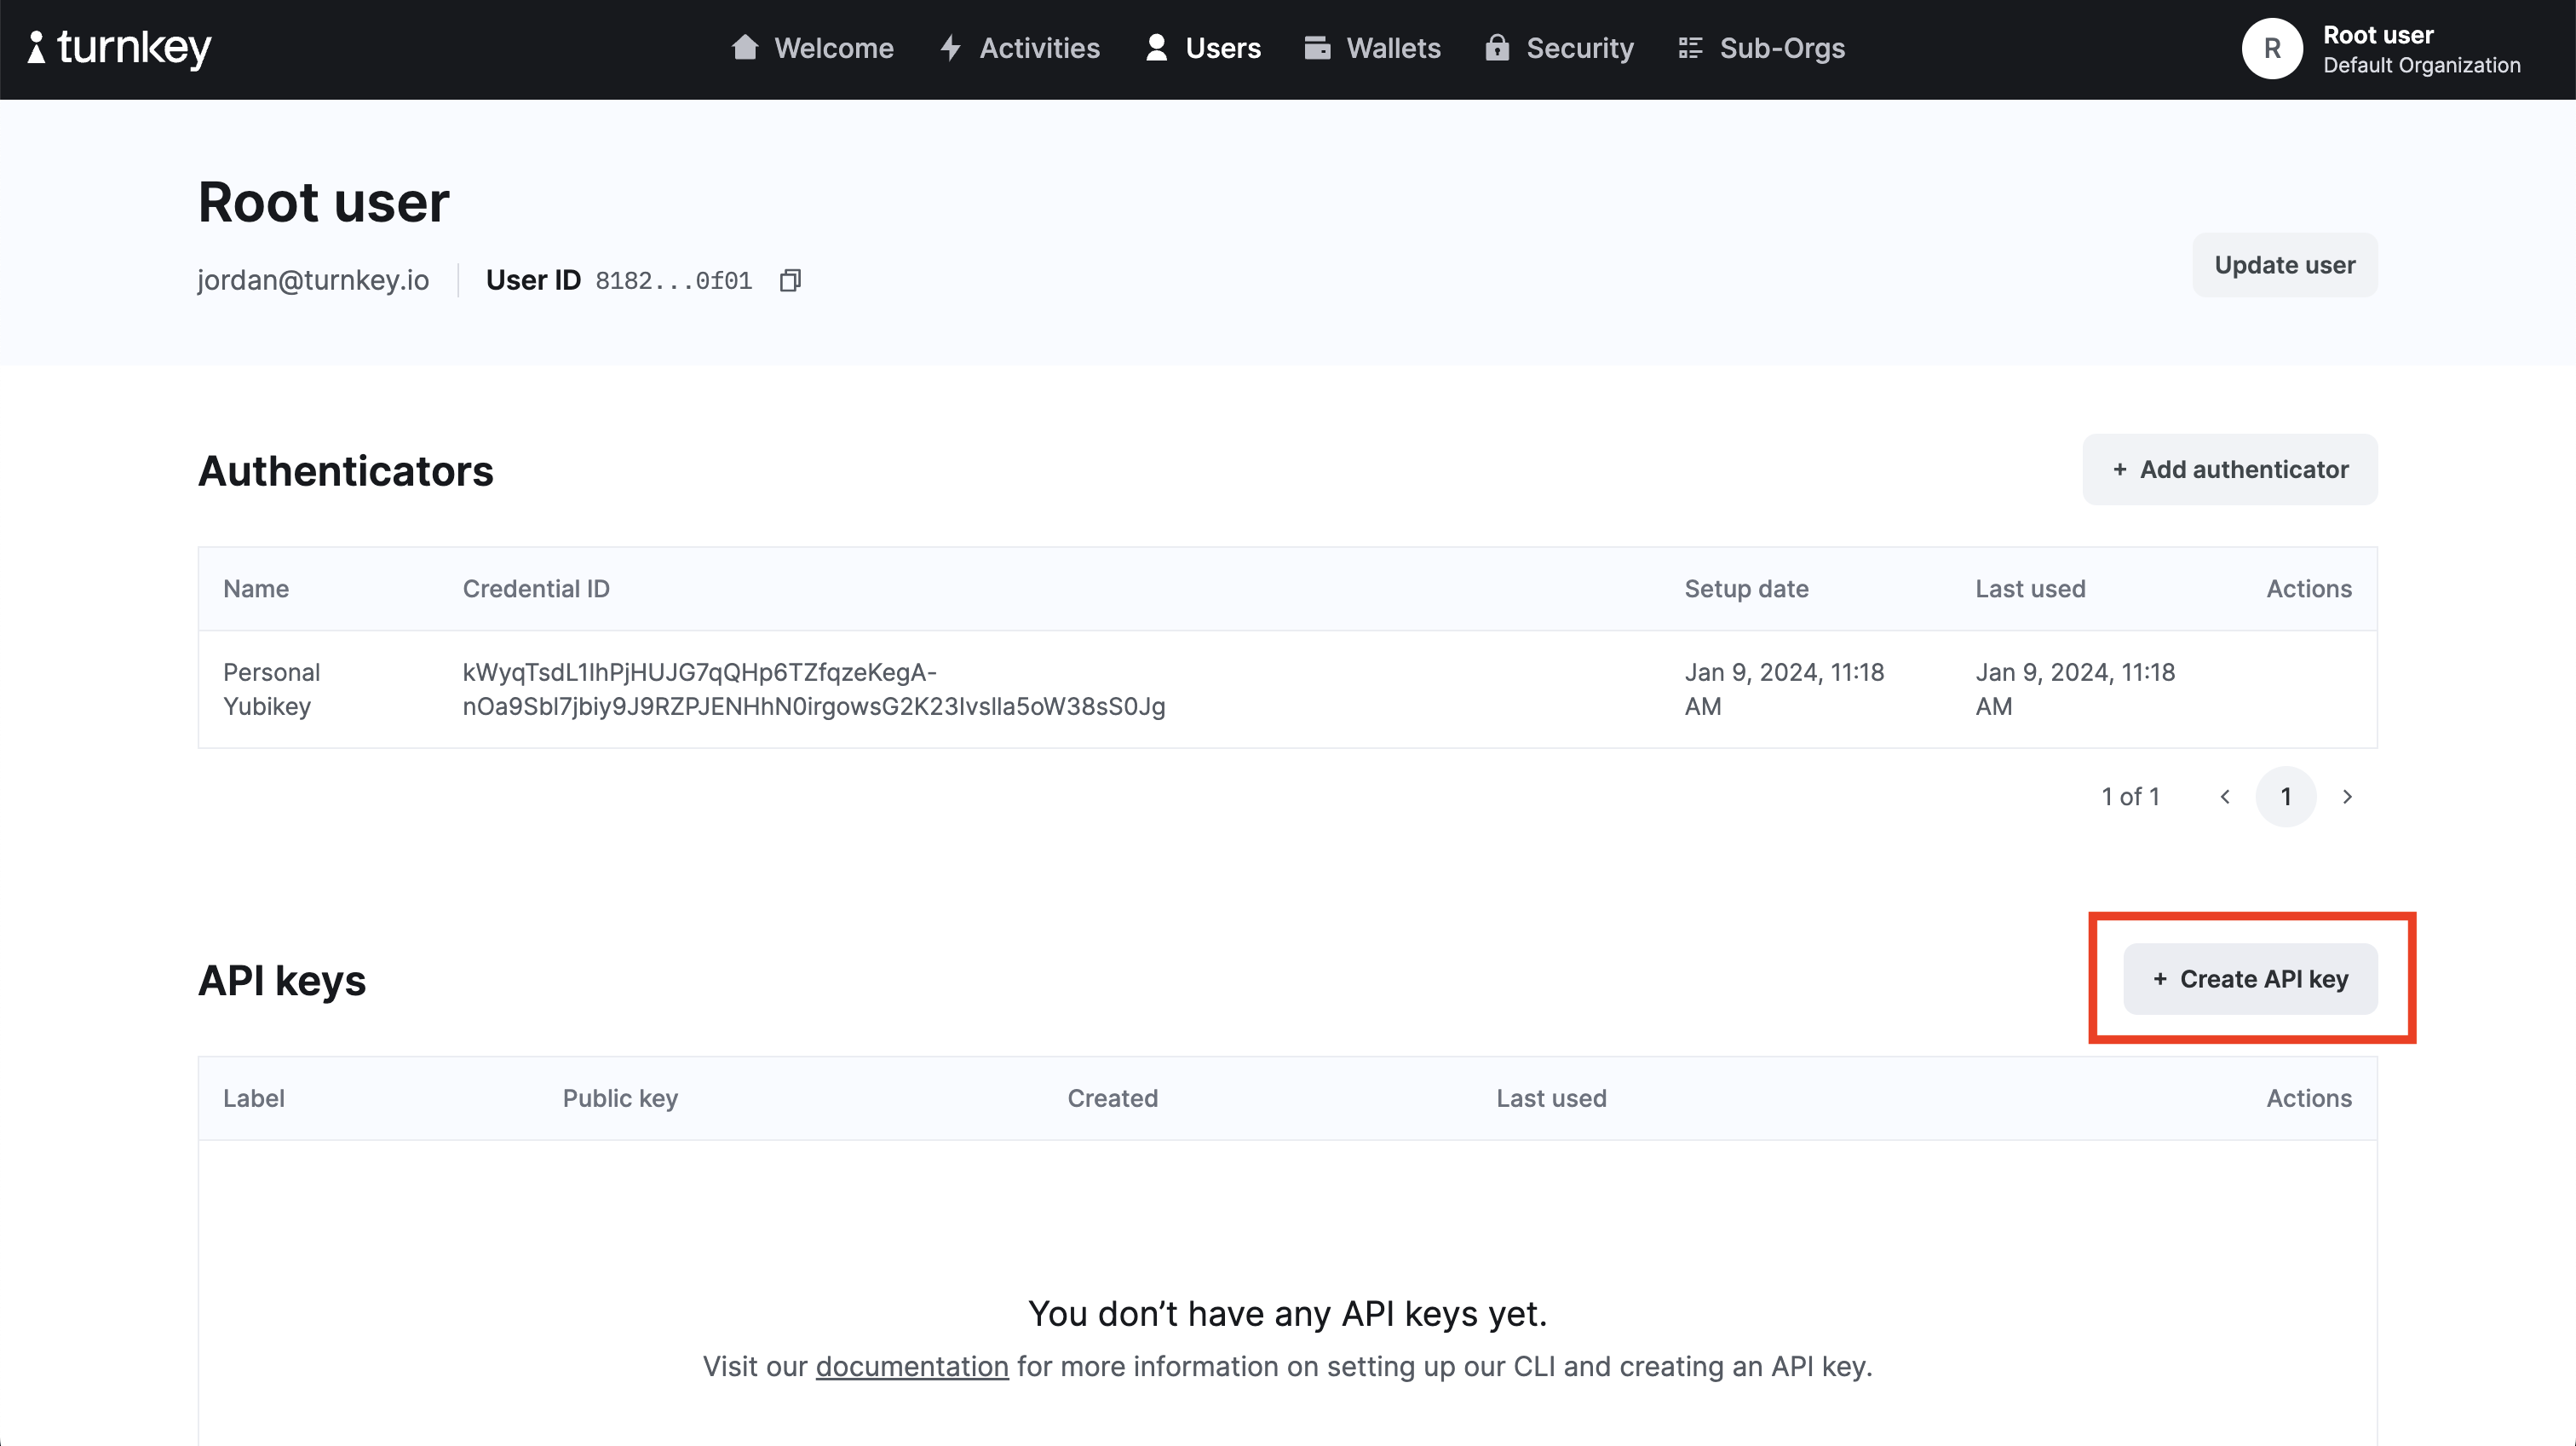
Turnkey API Keys are generic public / private key pairs that allow you to make requests to our API. You can create an API Key from your user page of the dashboard. Navigate to your user page by clicking on "User Details" in the user dropdown menu, and then click "Create an API key".


- Select "Generate API keys in-browser" and click continue.
- Give your API key pair a name and click continue.
- Save your Public and Private Key locally.
- Make sure to click "Approve" to sign the API Creation activity with your authenticator device.
A couple of notes:
- You will need both the public and private key to sign requests to the Turnkey API.
- Any code using a Turnkey API private key should only ever be run server-side.
- Every action on Turnkey will return an
activity, including creating the API key pair in the previous step. You can read more about the Turnkey Activity Model here.
Require the Turnkey Libraries
There are two libraries that you will need to make API requests to Turnkey:
- The Turnkey HTTP library.
- A Turnkey "stamper" library.
The stamper library is responsible for signing a request into Turnkey, and comes in 3 different flavors:
api-key-stamperwhich signs requests with your Turnkey API keywebauthn-stamperwhich signs requests with a end-user's passkeyiframe-stamperwhich is a wrapper around the api-key-stamper and used specifically for Email Recovery and Email Auth
The simplest way to get started, is to use the API Key Stamper to make requests to Turnkey that are signed with the API key pair you created in the previous step.
npm install @turnkey/http
npm install @turnkey/api-key-stamper
Initialize the Turnkey Client
import { ApiKeyStamper } from '@turnkey/api-key-stamper';
import { TurnkeyClient } from '@turnkey/http';

const TURNKEY_ORGANIZATION_ID = "<Your Org ID>";

const stamper = new ApiKeyStamper({
  apiPublicKey: "<Your Public Key>",
  apiPrivateKey: "<Your Private Key>"
})

const turnkeyClient = new TurnkeyClient(
  {
    baseUrl: 'https://api.turnkey.com'
  },
  stamper
);
Create a Wallet
A wallet on Turnkey represents a multi-chain seed phrase from which many individual accounts can be derived. An account represents a specific index on a derivation path and contains the blockchain address that you can send funds to and sign on-chain transactions with. The only thing a wallet needs to be initialized is a name for the wallet.
const response = await turnkeyClient.createWallet({
  organizationId: TURNKEY_ORGANIZATION_ID,
  type: 'ACTIVITY_TYPE_CREATE_WALLET',
  timestampMs: String(Date.now()),
  parameters: {
    walletName: "Test Wallet 1",
    accounts: []
  }
})

const walletId = response.activity.result.createWalletResult.walletId;
Create an Ethereum Account
Once a wallet has been created, accounts can be created against that wallet by passing in the derivation path information for any accounts that you want to derive. In this example we will derive Ethereum accounts, using the standard BIP44 Path format. The final number at the end of the path string represents the index in the derivation path that you want to derive the account for.
Note: If desired, you can also create accounts in the same API call where you create the wallet by passing in the account derivation paths as arguments to the createWallet call.
await client.createWalletAccounts({
  organizationId: TURNKEY_ORGANIZATION_ID,
  type: 'ACTIVITY_TYPE_CREATE_WALLET_ACCOUNTS',
  timestampMs: String(Date.now()),
  parameters: {
    walletId: "<Your wallet id>",
    accounts: [
      {
        path: "m/44'/60'/0'/0/0", // account at index 0
        pathFormat: "PATH_FORMAT_BIP32",
        curve: "CURVE_SECP256K1",
        addressFormat: "ADDRESS_FORMAT_ETHEREUM"
      },
      {
        path: "m/44'/60'/0'/0/1", // account at index 1
        pathFormat: "PATH_FORMAT_BIP32",
        curve: "CURVE_SECP256K1",
        addressFormat: "ADDRESS_FORMAT_ETHEREUM"
      },
      {
        path: "m/44'/60'/0'/0/2", // account at index 2
        pathFormat: "PATH_FORMAT_BIP32",
        curve: "CURVE_SECP256K1",
        addressFormat: "ADDRESS_FORMAT_ETHEREUM"
      },
    ]
  }
})
You can view the created accounts and their associated Ethereum addresses with
await client.getWalletAccounts({
  organizationId: TURNKEY_ORGANIZATION_ID,
  walletId: "<Your wallet id>"
})
Sign a Transaction
Once you have an account, you can sign a transaction with the account as follows.
await turnkeyClient.signTransaction({
  organizationId: TURNKEY_ORGANIZATION_ID,
  type: "ACTIVITY_TYPE_SIGN_TRANSACTION_V2",
  timestampMs: String(Date.now()),
  parameters: {
    signWith: "<Your ethereum address>" // i.e. 0x780ed9b6BF99908106d1bAA25b7658a80ADB5f42
    unsignedTransaction: "<Your unsigned transaction>", // i.e. 02eb018084db4f550d850bb6338fa88252089470a8a81613dd06dc243de94ebdf861ff5f82b361831e848080c0
    type: "TRANSACTION_TYPE_ETHEREUM"
  }
})
Make sure to replace the unsignedTransaction below with your own. You can use our simple transaction generator if you need a quick transaction for testing.
If you'd like to broadcast your transaction, you can easily do so via Etherscan.
Using the Webauthn Stamper
The previous actions all had to be signed server-side in our code using a Turnkey API key, but you can also have individual end-users sign Turnkey activities using their own passkeys using the webauthn stamper library. You can learn more about the specifics of the passkey implementation in the Passkey guide. You can also see an example of having an end-user sign a request with a passkey in our public Demo Passkey Wallet repository.
Best Practices (Using Sub-Organizations)
Due to cryptographic limitations of how much data can be signed at once, generally speaking, a common pattern is to create sub-organizations for each individual user, instead of creating wallets for each user directly on the parent organization. You can read more about how to properly do this in the Suborganization Guide.
Next Steps
- Check out our examples to see what can be built.
- Learn more about Organizations and Wallets.
- See our API design or dive into our API reference.